Universal Practices in LMS and Document Creation
Use the Universal Digital Practices—descriptive hyperlinking, appropriate fonts and colors, etc.—when crafting course sites and documents.
Syllabus Best Practices
Elements to include and why:
- Predetermined due dates and grade breakdown: These are both important to arranging accommodations and deciding whether or not to take a course.
- CAE statement: Provide a syllabus statement directing students to the CAE to register for disability-based accommodations. A suggested statement is at the bottom of the CAE Faculty FAQ page.
- If comfortable, express that you are open to listening to students who choose to disclose their disabilities. For more guidance, refer to the "Starting a Conversation about Disability" section on our Faculty Resources page and the CAE Faculty FAQ page.
Setting up LMS/CCLE and Other Course Tools
- Follow universal practices for all materials that you provide and present.
- Provide a hierarchy in the headers of your documents and course pages - for example, including Week tabs can organize course materials in a logical manner.
- Start your search for potential course tools early (at least a quarter in advance)! Choose external resources that are as accessible as possible and send them to the DCP for evaluation. For more details on this process, see our Choosing Accessible Course Tools guide.
- Familiarize students with any new tools in the LMS or for your course - for example, you could implement a syllabus quiz to practice test proctoring software.
Powerpoint Presentations
The best way to ensure that your presentation is accessible is to use an accessible template. At this time, the most accessible built-in template is "Blank Presentation". When creating a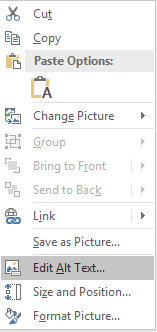 presentation, keep these things in mind:
- Follow universal practices - use descriptive hyperlinks, appropriate colors/fonts, etc.
- Alt text: To add alt text, right click the image/element and select "Edit Alt Text...". For adding alt text to larger groups of images, refer to the Grouping Images guide.
- Slide Titles: Make sure every slide has a slide title, by filling out the top text box in each slide of your presentation template. Use "___ Pt. X" to differentiate duplicate slide titles.
- If using elements such as arrows, circles, and boxes, do NOT mark these images as decorative. If an element adds any extra information to a page, such as highlighting a certain aspect of an image, add alt text explaining the relevance.
- Use the "Check Accessibility" function on your Powerpoint. See our "Checking Accessibility" section below for more guidance.
- Powerpoint accessibility is complex—we highly recommend referring to Microsoft’s Powerpoint Accessibility Guidelines for more details.
- For more information on accessible lecturing, refer to our "Universal Lecturing Techniques" guide on our Faculty Resources page.
Word Documents
The best practice is to make an accessible Word document, rather than remediate a poorly made Word document once it’s converted to PDF. Note that the images of buttons to the right may look different, depending on what type of computer you’re using - these screenshots were taken from a Mac device.
- Follow universal practices - use descriptive hyperlinks, appropriate colors/fonts, etc.
- Alt Text: to add alt text or mark an image as decorative, right click the image/element and select "Edit Alt Text…".
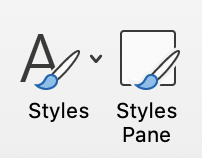
- Heading Structure: Highlight your text and denote it with the "Styles" section.
- Use the "Check Accessibility" function on your Word document. See our "Checking Accessibility" section below for more guidance.
- Refer to the extensive Word Doc Accessibility Guidelines for more details.
Checking Accessibility in Word and Powerpoint
To check the accessibility of your Powerpoint presentation or Word document:
- Convert your document to .pptx or .docx form if they are not already in this format.
- Open the Accessibility Checker by selecting "Tools" > "Check Accessibility", or by clicking "Check Accessibility" in the Review tab. Each issue will have a description of “Steps to Fix” in the Accessibility Tab.
Converting to PDF
(This is a vital step for retaining maximum accessibility in your document!)
Convert Word documents and Powerpoint presentations to high-quality PDFs in the same way, using Adobe:
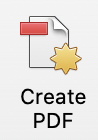
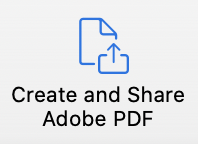
- On Mac, click the "Create and Share Adobe PDF" icon on the Home tab. You can also click the Acrobat tab, then click "Create PDF."
- On Windows, click the Acrobat tab, then click "Create PDF."
- On any platform, do NOT: select File > Save As or Print > Save As PDF
- If you cannot find a "Create Adobe PDF" button:
- Download Adobe Acrobat if you don't already have it.
- Open Adobe Acrobat, click the "Tools" tab, and then click the "Create PDF" button to create the Adobe-formatted PDF from within Acrobat.
- Refer to Acrobat’s Troubleshoot PDFMaker Issues page or Acrobat’s PDFMaker Toolbar Unavailable page for further troubleshooting.
Once your document has been converted to a PDF, use Adobe’s Accessibility Checker to make sure that your content is still accessible - refer to the PDF Best Practices section below for more guidance.
PDFs
- After converting to PDF as described above, use the search bar on the right to find and select "Accessibility Check," and then click the "start checking" button in the pop-up window.
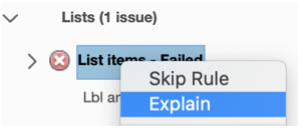
- In the left panel, right-click any issue and select "Explain" for an explanation of the issue.
- Make sure to manually check reading order—refer to our Checking Reading Order guide for extensive instructions.
- Caution: for PDFs created using the methods described in this guide, Do NOT use the "Make Accessible" action. This will interfere with the accessibility features preserved during the Adobe PDF conversion.