The reading order of a document or presentation determines the order that a screen reader will read out content. Verifying the reading order is imperative to ensuring that all students have equal access to the materials. Even if objects in your document or presentation appear to be ordered logically, you should always check the reading order.
Below, we have guides on how to check reading order in Microsoft Powerpoint and Adobe Acrobat.
Powerpoints
In Powerpoint, the selection pane is used to check the reading order of individual slides. Reading order is especially important with Powerpoints, as there’s less defined heading structure than in a longer document or webpage.
- If you use the “check accessibility” function (by selecting the “Review” tab and then “Check Accessibility,” or selecting “Tools” in the Mac toolbar and then “Check Accessibility”), Powerpoint will flag any slides where the reading order may be off.
- Even if powerpoint doesn’t flag something, there could still be slides with illogical reading order — this happens frequently when adding new elements or pictures to slides. So, we recommend that you check the reading order when slides have many elements, or simply check as you create your powerpoint.
To open and use the selection pane:
- In the home tab, click on the “Arrange” icon, then select “Selection Pane” at the bottom of the dropdown menu.
 If you do not see the “Arrange” icon in the home tab, try this: select any element in a slide (eg. picture, text box, etc).
 - Open up the red “Picture Format” or “Shape Format” tab, then select the “Arrange” icon > “Selection Pane''.
- It’s also possible that there is a standalone “Selection Pane” icon in the “Shape Format” tab.
- In the Selection pane, you’ll see the elements of your individual slide. Note that reading order starts from the bottom of the Selection Pane and moves upward.
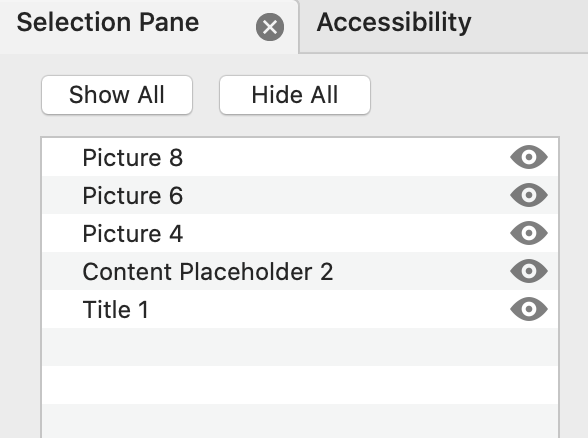
- i.e. a screen reader will read the elements from bottom to top of the selection pane. Thus, the slide title should be last in the selection pane, and the subsequent information should move up the pane.
- If confused about which element is which—for example, if you have many images on a slide and they are all marked as such—you can click on each element in the selection pane and it should be highlighted in the slide.
- To adjust the reading order, click and drag the object name to move it up or down in the selection pane. Again, remember that the reading order goes from the bottom, up.
- To test out the reading order as a screen reader would read it, click on the slide, then press the “tab” key to navigate through each element in its current order.
PDFs in Adobe Acrobat
When you run the accessibility checker in Adobe Acrobat, you’ll be able to see the content of your document in a few different forms, including in a content panel and a tags panel. Reading order has the most to do with the content panel, and it’s likely that you won’t need to manually tag your documents. Thus, first follow the guidelines below to check the reading order, and if problems arise, an alternate course of action can be found at the end of this section.
If you're already running the Accessibility Checker:
Reminder: To run the accessibility checker, search for “Action Wizard” in the “Search Tools” bar on the right side. Select “Make Accessible” and click “Start”.
You’ll notice that under the “Document” section, the option for “Logical Reading Order” is always marked as “Needs manual check” - this is because a program can’t determine whether reading order is reasonable. If you right-click (Windows) or Ctrl-click (Mac OS) the logical reading order item in the Accessibility Checker panel, you’ll see options to pass, fail, skip, or explain the issue. For other items that don’t require a manual check, there are options to fix, skip, or explain the issue.
![]() To check the reading order, you’ll essentially need to make sure that the reading order displayed in the Order panel coincides with the logical reading order of the document. The Order panel is denoted with a Z over four boxes, as shown to the right. If you don’t see this icon, you can right-click the ribbon containing the other panel symbols (on the left side) and select “Order”.
To check the reading order, you’ll essentially need to make sure that the reading order displayed in the Order panel coincides with the logical reading order of the document. The Order panel is denoted with a Z over four boxes, as shown to the right. If you don’t see this icon, you can right-click the ribbon containing the other panel symbols (on the left side) and select “Order”.
- In the Order panel, you’ll see a list of highlighted regions that appear in the document pane. Each section of contiguous page content appears as a separate highlighted region and is numbered according to its placement in the reading order.
- If there aren’t numbered selections of text visible on your PDF, you’ll need to open the reading order panel by selecting “Reading Order” in the right pane.
- In the Reading Order dialog box, check the box next to “Show page content groups” then click “Page content order” if not already selected.
- There should now be boxes containing reading order content, whose numbers correspond to the groupings in the Order panel on the left.
- Check that numbers go in a logical order, paying special attention to figures and captions as they relate to the body text.
- To change the order, select any box in the Order Panel list and drag it to the correct location. As you drag, a line appears to show potential locations.
- After you drag an item to a new location, the highlighted regions are renumbered to show the new reading order. You can select and move multiple, adjacent regions.
If you want to just check reading order, or if the order panel isn’t visible in the left pane: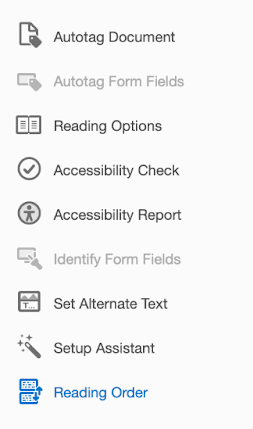
- Search for “Accessibility” in the Search bar (located in the upper right corner).
- Select the Reading Order tool in the right pane.
- In the Reading Order dialog box, click Show Order Panel.
- Follow the steps above to check and change the order to properly reflect the intended reading order.
In the case that the order panel is missing some or all content:
It’s possible that your document isn’t properly tagged, and you’ll need to manually tag your document. The DCP has a video on Advanced Reading Order, which goes over how to tag text with the proper content label when the document has NO tags.
If only a few sections of text aren’t included in the reading order: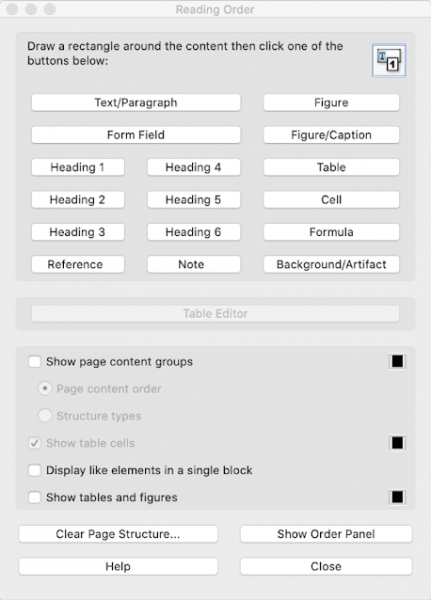
- Take your cursor and create a rectangle around the section/group of text that isn’t included.
- Right-Click on the section you created in the document, or in the floating reading order panel, choose what type of text it is (Text, figure, Heading 1, Heading 2, etc.). The group will now show up in the order panel.
- Do this for each section/group that will need to be read that isn’t already an item in the order panel.
- Drag and drop the elements to edit the order in which the items are read.
- Make sure to select and designate tables as “Tables” to ensure correct reading order.
If the text selections and ordering are completely unable to be ordered properly:
- Right-Click on the wrong order items and select “Delete Selected Item Structure”. You will see the highlighted sections with a number indicating the order it would be read disappear from the document.
- Follow the same directions as above to select, assign, and order groups of content.
Source: Reading Order Tool for PDFs (Acrobat Pro)
Source: Creating an Accessible Word Document (Oregon Educator Network)