UCOP vs UCLA Zoom Accessibility
You may have seen the UCOP Zoom Accessibility page, while the information is very similar, use this page. The discrepancies are due to the fact the UCOP page is not specified to UCLA's platforms and policies.
Introduction
When using online tools for remote work, it is important not only to use tools with an accessible interface, but also to know how to use them so people with disabilities can participate.
This page offers some tips for using Zoom so that your remote online experiences are accessible. Information and resources will be added as we gain more information.
Fortunately, Zoom provides a pretty accessible interface and provides information about accessibility, including how to create closed captions.
- Captioning and Transcripts for recorded Zoom Sessions posted to Bruin Learn
Zoom recordings that are uploaded to Bruin Learn will be captioned and transcripted (identical files) by an AI, thanks to our partnerships with Kaltura and Verbit. The uploader does not have to take any extra action. The captions and transcripts will not be immediate, there will be a processing time. If there is a problem, for example if there are no captions/transcripts after a couple of days, please contact Bruin Learn Support.
Note: Zoom offers automated transcripts with their Cloud Recordings. UCLA does not currently have this feature.
Recording your Lecture in Zoom
Preparation
- Ensure you have the Zoom Desktop Client.
- Refer to UCLA Guidance on Remote Teaching Using Zoom Protecting Privacy and Data for privacy requirements in recording your lectures.
Recording a Lecture
Note: You’ll see participants (students) in a meeting (class) are prohibited from recording; only a host (instructor) is permitted to record. Participants will not be able to record sessions without the host’s permission, do not grant this permission to the students.
- Launch your Zoom session in the Desktop Client application. Zoom sessions in the web browser cannot locally record.
- See UCLA Guidance on Remote Teaching Using Zoom Protecting Privacy and Data for giving notice prior to recording.
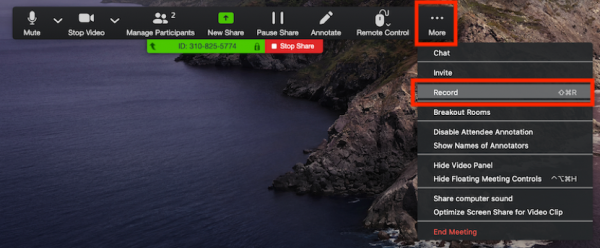
- Hover your mouse or tab to (for tab, you will need "Always Show Meeting Controls" enabled) to the bottom of the Zoom window, a set of tools will appear. Click Record to start recording the session.

- If you are unable to locate the Record button, click on the More… button, a drop-down list with Record will appear.
- If you are unable to locate the Record button, click on the More… button, a drop-down list with Record will appear.
- You can pause or stop recording at any time.
- Pause recording will results in one continuous video.
- Stop recording will result in many videos if you resume recording during the session.

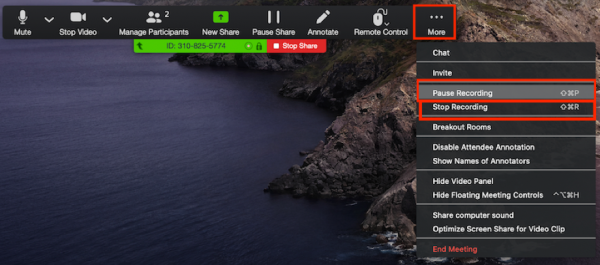
- To end recording, hover your mouse or tab to (for tab, you will need "Always Show Meeting Controls" enabled) to the bottom of the Zoom window and click Stop Recording.
- If you are unable to locate the Stop Recording button, click on the More… button, a drop-down list with Stop Recording will appear.
- If you are unable to locate the Stop Recording button, click on the More… button, a drop-down list with Stop Recording will appear.
- Click End Meeting to render your recording into a mp4 file (NOTE: Do not close your device as this will stop the rendering process and will not have a mp4 file. It can take up to 20 minutes for a one hour lecture).
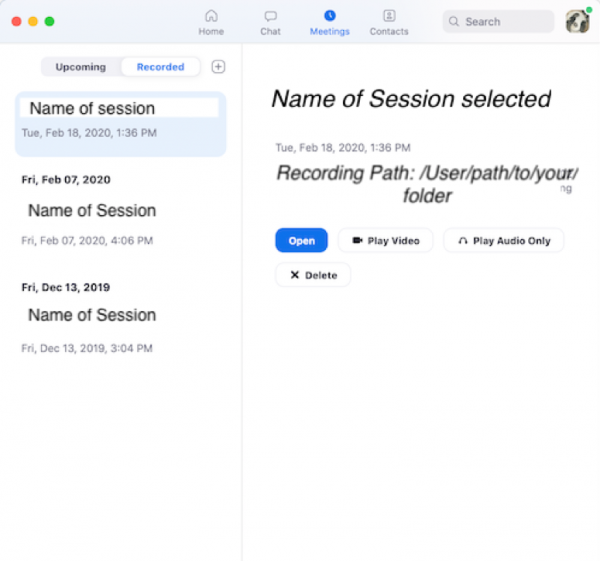
Recordings are stored locally on your computer, typically in your Document folder. Once the meeting is complete, the recording will be converted and saved to your computer. To revisit past recordings, click on the Meetings Tab from the Home Screen and select Recorded.
You will be able to play full meetings with video or just audio, delete recordings, or open the file folder to access the recording file.
Posting Your Lecture to Your Bruin Learn Site
- Click the Turn editing on button in the upper right-hand corner of your site page.
- Click navigate to the section you wish to post your video.
- At the bottom of the section, locate the +Drag and drop file(s) here.
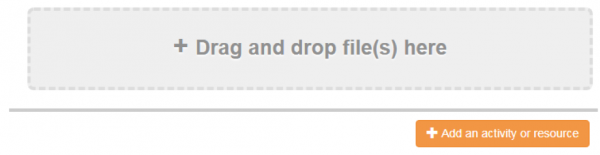
- Drag your video into the +Drag and drop box.
- A Dialog box will appear.
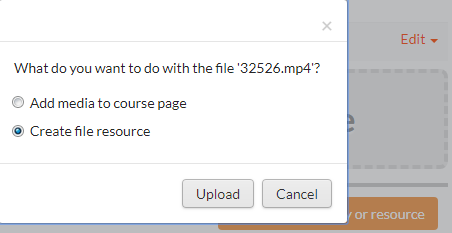
- Select Create file resource, then click Upload.
- Wait between 10 - 20 minutes for the video to convert, once it is done, will appear as a link on your site.
If this method does not work for you, please follow the instructions on how to add a Video Resource.
If you are having a problem with Bruin Learn, please contact your local IT support.
Thanks to Caroline Kong and the Bruin Learn team for their content.
- YouTube Captions (Not Recommended)
We cannot endorse YouTube automated captions as they are not WCAG accessible. However, if this is needed for some reason, you must touch-up and manually edit the captions for accuracy.
Automated Captions through YouTube. To get captions added post production, another option is to export the recording to YouTube, which will auto caption the recording. You then need to proof and correct the captions.
- If your campus doesn't use Google, create a YouTube account for your work-related videos.
- Upload the video to YouTube as a private recording until the captions are completed and you want to make the video public.
- Once your video has been uploaded, go to the YouTube Studio. From there, click on your video and select the Advanced tab.
- YouTube is migrating to “YouTube Studio” from “Video Manager.” Currently the Studio doesn't have the CC option. For now, they are allowing you to use the old version to add captioning.
- Under Subtitles and CC for original video language, select English by YouTube (automatic) and select Edit in Classic Studio.
- If you don't see that option, YouTube probably just needs more time to process the video. The longer the video, the longer the processing will take.
- This should take you to the caption editing page. Above the video, click the Edit This should allow you to edit the captions on the right of the video screen. Once you've finished, click Publish Edits above the video.
- Tips for Meetings with Screen Reader Users
- Meeting invitations. When creating a meeting invitation,
- Put the URL on a blank link without any other text or characters around it. This enables the screen reader user to just hit enter to access it, rather than also having to tab over the text.
- Do not put the URL in the location line because it does not appear as a live hyperlink; put it in subject line or the body of the email.
- Participant list. Screen reader users can access the participant list, though it's cumbersome for them. Be sure to read the participant names out loud at the start of the meeting.
- Participation. Suggest people use “raise hand” so that everyone can have a chance to speak and make sure they know the keyboard shortcuts: Alt Y (command Y) for raise hand, and Alt A (command A) for muting yourself.
- Screen shares and whiteboarding. These features are inaccessible. The content should be described out loud whenever used.
- Chat
- Chat is disruptive for screen reader users because when they turn on speech mode, it is read out loud over other talk and hinders them from following the rest of the meeting.
- Use the chat for important things, to avoid excluding the screen reader user.
- Be sure to record the meeting, which provides an archive of the chat as a text file. This ensures the screen reader user can access links and other information shared in chat.
- Meeting invitations. When creating a meeting invitation,
- General Presentation Etiquette
- Prepare in advance for an accessible session. Find a quiet site so there's no background noise. Have presenters look at the camera so people can see facial expressions and/or read lips.
- Provide accessible materials. Slides presented in Zoom are not accessible to screen readers, so try to send materials in advance or post them somewhere to make them available. Make sure those materials (PPT or a document) are themselves accessible.
- Be accommodating. Let participants know they can request accommodations if necessary. If you're using features that may not be accessible, like whiteboarding, plan how you'll describe/provide the information to participants who need it. Maybe you'll find an additional accessible tool to provide that feature. Describe what's going on in the meeting. Describe charts and graphics, announce who's speaking. Remember, not everyone may be able to see what's going on.
- Live captioning of Zoom Lectures
For this accommodation for a Deaf or hard of hearing student, the CAE will work with the student to implement StreamText. The professor/lecturer will not have to get involved in this accommodation.
However, if there is an issue with StreamText. There is a back-up option of having a live captioner attend lecture. If this is needed, the professor/lecturer/host will need to follow the steps for live captioning in Zoom.
- Live captioning of Zoom Meetings
If you are going to host a meeting, depending on the audience, you may need to arrange for closed captioning while the meeting is in session. There are two ways to do this:
Closed captioning in Zoom (not automated). If this service is needed for Deaf or hard of hearing staff or faculty, contact IRM for a live captioning accommodation.
***Investigation into automated captioning is currently taking place. This section will continue to be updated.
***If you are having a problem with Bruin Learn, please contact your local IT support.